正文
如何运行单页面Vue文件
- 创建
.vue文件 - 使用
vue serve XXX.vue命令
 DONE  Compiled successfully in 20636ms    下午9:50:54

  App running at:
  - Local:   http://localhost:8080/
  - Network: http://192.168.3.22:8080/

  Note that the development build is not optimized.
  To create a production build, run npm run build.
在浏览器中输入 Local 地址就可以查看成果.
简单的.vue的Demo
目标:
- 使用无序数列在网页上打印数组
- 单击选中背景变色
- 点击添加,将选中的数字添加到下方页面
1.创建.vue文件

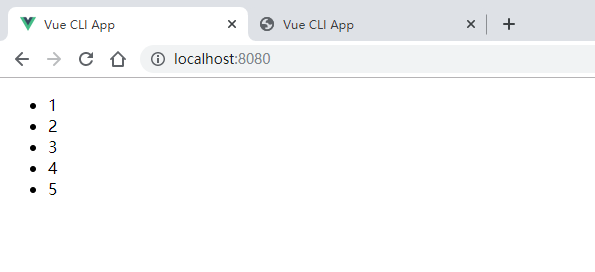
2.打印数组
1
2
3
4
5
6
7
8
9
10
11
12
13
14
15
16
17
18
19
20
21
<template>
    <div>
        <ul>
            <li v-for="(item, index) in listA"
            :key="index">
                {{item}}
            </li>
        </ul>
    </div>
</template>

<script>
export default {
    name: 'demo2',
    data () {
        return {
            listA: [1,2,3,4,5]
        }
    }
}
</script>
3.单击选中的行背景变色
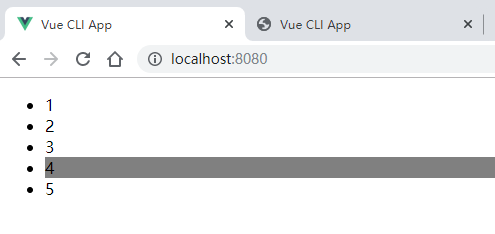
①先写好样式active
1
2
3
.active{
    background: grey
}
②设置变量current初始值为-1,用来记录当前选中的索引
③为li绑定click事件@click="choose(index),在export default新增:
1
2
3
4
5
6
methods: {
        choose (index) {
            this.current = index
            window.console.log(this.current)
        }
    }
④为li绑定class事件,:class="{'active' : current == index}"
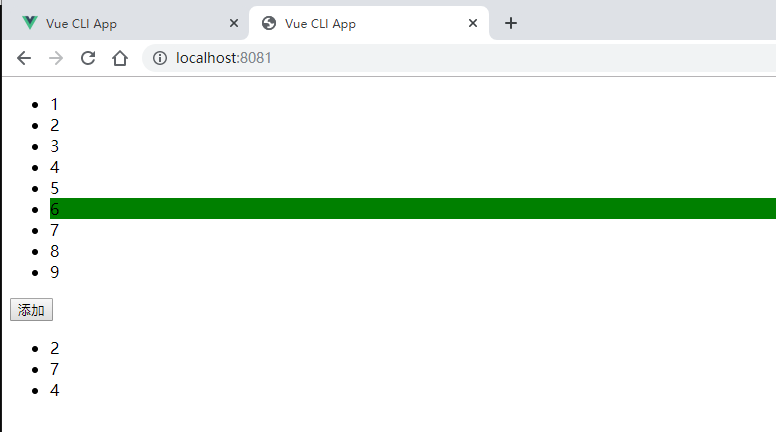
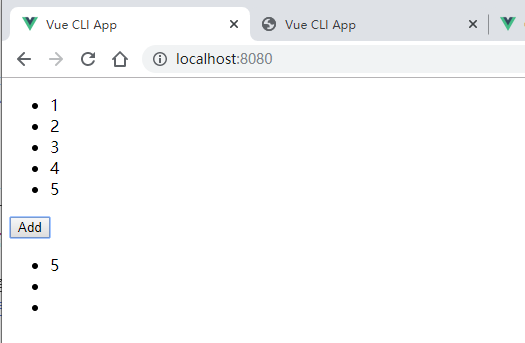
4.添加按钮,以及显示选中元素
① 添加按钮 — <button @click="add()">Add</button>
② 设置空数组用来接收被选中元素
1
listB: []
③ 在页面打印listB数组
1
2
3
4
5
<ul>
    <li v-for="(item, index) in listB" :key="index">
        {{item}}
    </li>
</ul>
④ 编辑add()函数
1
2
3
4
add () {
    this.listB.push(this.listA[this.current])
    this.current = -1
}

5.改进完善
现在页面的缺陷是:
- 当我们点击完添加后,不再选中元素,点击Add会添加空元素
解决方法:
- 在Add()函数中增加判断
1
2
3
4
5
add () {
    if(this.current == -1) return
    this.listB.push(this.listA[this.current])
    this.current = -1
}
备忘录 — 《 Demo-memo 》
项目模块
- 登陆、注册
- 用户中心 – 添加计划
- 计划列表 – 遍历现有计划
使用到的技术
- vue、vue-router、vuex
- css、scss
实现步骤
1.创建项目
使用vue ui指令,在网页端进行工程创建.
2.views文件夹目录
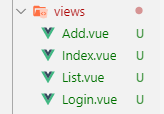
- List.vue — 登陆界面
- Index.vue — 后台主页面(展示各项计划)
- List.vue — 打印store中用于记录的数组
- Add.vue — 新增计划页面
3.实现思路
- 先完成登录界面
- 将List.vue和Add.vue整合到Index.vue中
- 完成Add.vue中逻辑
- 完成List.vue中逻辑
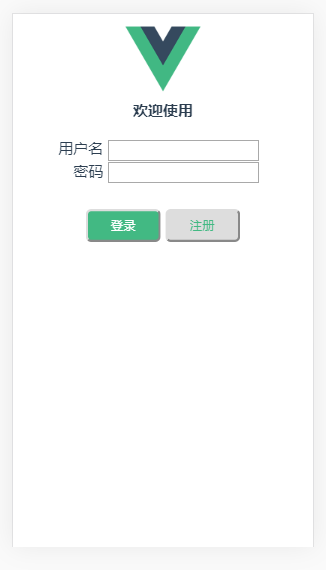
4.Login.vue实现,以及相关router的配置
1
2
3
4
5
6
7
8
9
10
11
12
13
14
15
16
17
18
19
20
21
22
23
24
25
26
27
28
29
30
31
32
33
34
35
36
37
<!-- 登录模块 使用v-if语句,在data中设置boolean类型值isReg,用于判断哪个模块显示,哪个模块隐藏-->
<div id="login-log" v-if="!isReg">
<div class="login-name">
<font>用户名</font>
<!-- v-model 将data中变量绑定到HTML元素上 -->
<input type="text" v-model="name">
</div>
<div class="login-password">
<font>密码</font>
<input type="password" v-model="password">
</div>
<div style="padding-top: 75px">
<button type="button" class="btn-log" @click="log()">登录</button>
<button type="button" class="btn-reg" @click="reg()">注册</button>
</div>
</div>
<!-- 注册模块 -->
<div id="login-reg" v-else>
<div class="login-name">
<font>用户名</font>
<input type="text" v-model="name">
</div>
<div class="login-password">
<font>密码</font>
<input type="password" v-model="password">
</div>
<div class="login-password">
<font>确认密码</font>
<input type="password" v-model="repeat">
</div>
<div style="padding-top: 75px">
<button type="button" class="btn-log"
@click="addUser()">确定</button>
<button type="button" class="btn-reg" @click="cancel()">取消</button>
</div>
</div>
1
2
3
4
5
6
7
8
9
10
11
12
13
14
15
16
17
18
19
20
21
22
23
24
25
26
27
28
29
30
31
32
33
34
35
36
37
38
39
40
41
42
43
44
45
46
47
48
49
50
51
52
53
54
55
56
57
58
59
60
61
62
63
64
65
66
67
68
69
70
71
72
73
74
75
76
77
78
79
80
<script>
export default {
  name: 'login',
  data () {
    return {
      //判断登录还是注册模块显示
      isReg: false,
      //绑定页面上的元素
      name: '',
      password: '',
      repeat: ''
    }
  },
  methods: {
    reg () {
      this.isReg = true
    },
    cancel () {
      this.isReg = false
    },
    addUser () {
    //   使用localStorage存储用户名密码
      if (this.password === this.repeat) {
        // setItem('键','值'),用于存值
        localStorage.setItem('name', this.name)
        localStorage.setItem('password', this.password)
        alert('注册成功!')
        // 注册成功后隐藏注册模块,显示登录模块
        this.isReg = false
      } else {
        alert('两次密码不一致')
      }
    },
    log () {
      //使用getItem('键')方法,从localStorage中取值,判断是否与输入一致,一致则登录成功
      if (localStorage.getItem('name') === this.name && localStorage.getItem('password') === this.password) {
        alert('登录成功!')
        this.$router.push('/index')
      } else {
        alert('密码输入错误!')
      }
    }
  }
}
</script>

<style scoped>
*{
 text-align: center;
}
#login-log,#login-reg{
  margin-top: 20px;
}

.login-name,.login-password{
  position: relative;
  float: right;
  margin-right: 50px;
  margin-top: 0px;
}

.login-name font,.login-password font {
  margin-right: 5px;
}

.btn-log{
  background: #42b983;
  color: white;
  width: 80px;
  height: 35px;
  border-radius: 6px;
}

.btn-reg{
  color:#42b983;
  width: 80px;
  height: 35px;
  border-radius: 6px;
}
</style>
Login界面截图:
1
2
3
4
5
6
7
8
9
10
11
import Login from '../views/Login.vue'

const routes = [
  {
    // 将Login页面设为主页,直接用"/"即可
    path: '/',
    name: 'login',
    component: Login
    // component: () => import(/* webpackChunkName: "about" */ '../views/About.vue')
  }
]
5.Index.vue以及相关router配置
1
2
3
4
5
6
7
8
9
10
11
12
<template>
  <div>
    <router-view/>
    <ul class="footer">
      <!-- 这里:to用作路径跳转,相当于a标签 -->
      <li class="icon"><router-link :to="{name: 'list'}">待办事项</router-link> </li>

      <!-- :to中的name 是router中设定的name-->
      <li class="icon"><router-link :to="{name: 'add'}">添加事项</router-link> </li>
    </ul>
  </div>
</template>
1
2
3
4
5
6
7
8
9
10
11
12
13
14
15
16
17
18
19
20
const routes = [
  {
    path: '/index',
    name: 'index',
    component: () => import('../views/Index.vue'),
    // 这里使用children,将List和Add变为子元素
    children: [
      {
        path: 'add',
        name: 'add',
        component: () => import('../views/Add.vue')
      },
      {
        path: 'list',
        name: 'list',
        component: () => import('../views/List.vue')
      }
    ]
  }
]
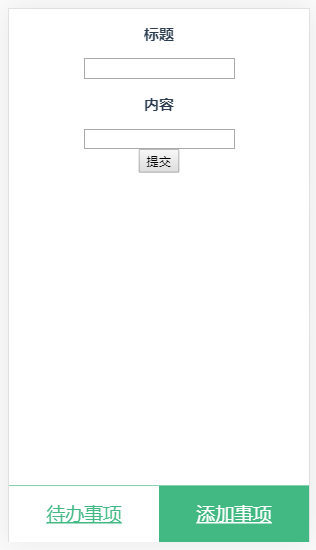
6.vuex的使用以及Add.vue实现
1
2
3
4
5
6
7
8
9
10
11
12
13
14
15
16
export default new Vuex.Store({
  state: {
    // 新建一个空数组,用于存储
    memo: []
  },
  mutations: {
    // 函数addItem,接收state以及后面传入的value,将value传入memo数组
    addItem (state, value) {
      state.memo.push(value)
    }
  },
  actions: {
  },
  modules: {
  }
})
1
2
3
4
5
6
7
8
9
10
11
12
13
14
15
16
17
18
19
20
21
22
23
24
25
26
27
28
29
30
31
32
33
34
35
36
<template>
  <div style="text-align: center;">
    <p><strong>标题</strong></p>
    <input type="text" v-model="title">
    <p><strong>内容</strong></p>
    <input type="text" v-model="content"><br>
    <button type="button" @click="add()">提交</button>
  </div>
</template>

<script>
import store from '../store'
export default {
  name: 'add',
  store,
  data () {
    return {
      title: '',
      content: ''
    }
  },
  methods: {
    add () {
    //   注意! 这里commit 传入要执行的方法名
      store.commit('addItem', {
        title: this.title,
        content: this.content
      })
      this.title = ''
      this.content = ''
      //最后跳转回list页面
      this.$router.push('/index/list')
    }
  }
}
</script>
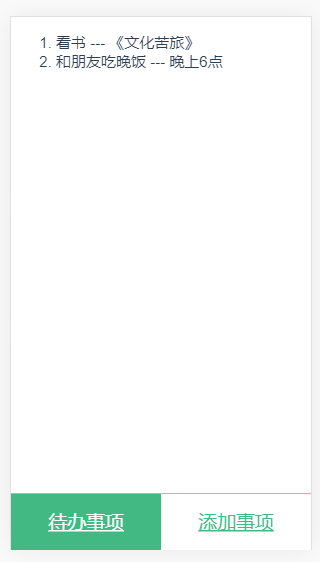
7.List打印memo数组
1
2
3
4
5
6
7
8
9
10
11
12
13
14
15
16
17
18
19
20
21
22
23
24
25
<template>
  <div>
    <ol>
      <!-- 这里可以直接遍历pageList -->
      <li v-for="(item, index) in pageList" :key="index">
        {{item.title}} --- {{item.content}}
      </li>
    </ol>
  </div>
</template>

<script>
// 导入store
import store from '../store/index'
export default {
  name: 'user',
  store,
  computed: {
    // 这里pageList返回值为一个数组,所以可以直接遍历
    pageList () {
      return store.state.memo
    }
  }
}
</script>
成果截图